Well! To start off the DIY series(ish), I bring you the honey mask! Dun da na naaaa!
This face mask is good for dry skin (though really it's good for all skin types, just dry skin specifically) and also any impurities (blackheads, pimples, redness).
I can guarantee that you will not look this glamorous
First off, ingredients:
- Honey, manuka is best as it has more healing qualities than regular honey (very moisturising, reduces redness, deeply cleansing, antibacterial)
- (optional) milk (moisturising, reduces redness)
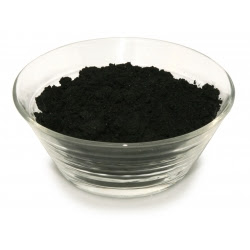
- (also optional) some form of exfoliant, some that I like are rice flour (only a little exfoliating, easy on sensitive skin), powdered charcoal (more exfoliating, good for oily skin, though I use it for dry as well, deeply cleaning. You should be able to buy it at a health food store), salt (sea salt, not table salt. Very exfoliating, be careful if you have sensitive skin as it can be quite abrasive)
And look, I even made you some adorable doodles. I am just that nice.
1. Cleanse your face
2. Mix honey (enough to coat your face (probably 0.5mm thick, if you wish to know specifically)) with other ingredients you may be using or just take that amount out of the container (you can hold it in your hand if you want).
Milk - just a splash, you don't want it to be too runny and fall off your face
Exfoliant - half to one teaspoon mixed in with the honey, depending on how exfoliating you want the mask to be, more for more exfoliation, less for less, etc.
Here is a diagram to help with my mixing
3. Apply to face.
If it is honey or milk and honey mask, leave for 10-30 mins
If exfoliating, apply to face and rub in circular motions, you can then leave it for 10 minutes or just wash it off
I enjoy reading my book whilst waiting
4. Wash off face with a washcloth
5. Moisturise as needed
And there you have it.


No comments:
Post a Comment